Adafruit Boards and Mu
Adafruit make a wide variety of amazing microcontroller based boards which are capable of running their own version of MicroPython called CircuitPython. These boards range from the incredibly small to powerful boards with tons of built-in hardware features. Even better, Adafruit have nurtured and grown a thriving online community associated with CircuitPython and their amazing line of boards. This is a supportive and helpful place to be if you’re a beginner coder – especially if you’re into making small embedded computers (such as the boards made by Adafruit) do funky stuff with real-world peripherals, then this is the place for you.
Mu’s Adafruit mode is made in collaboration with Adafruit and makes it very easy to create projects and write code for their line of boards. For example, your Python code to run on Adafruit boards is stored on the boards. Mu understands this and will detect and open files on any device plugged into your regular computer.
The extra functionality provided by Adafruit mode is contained in the following buttons:

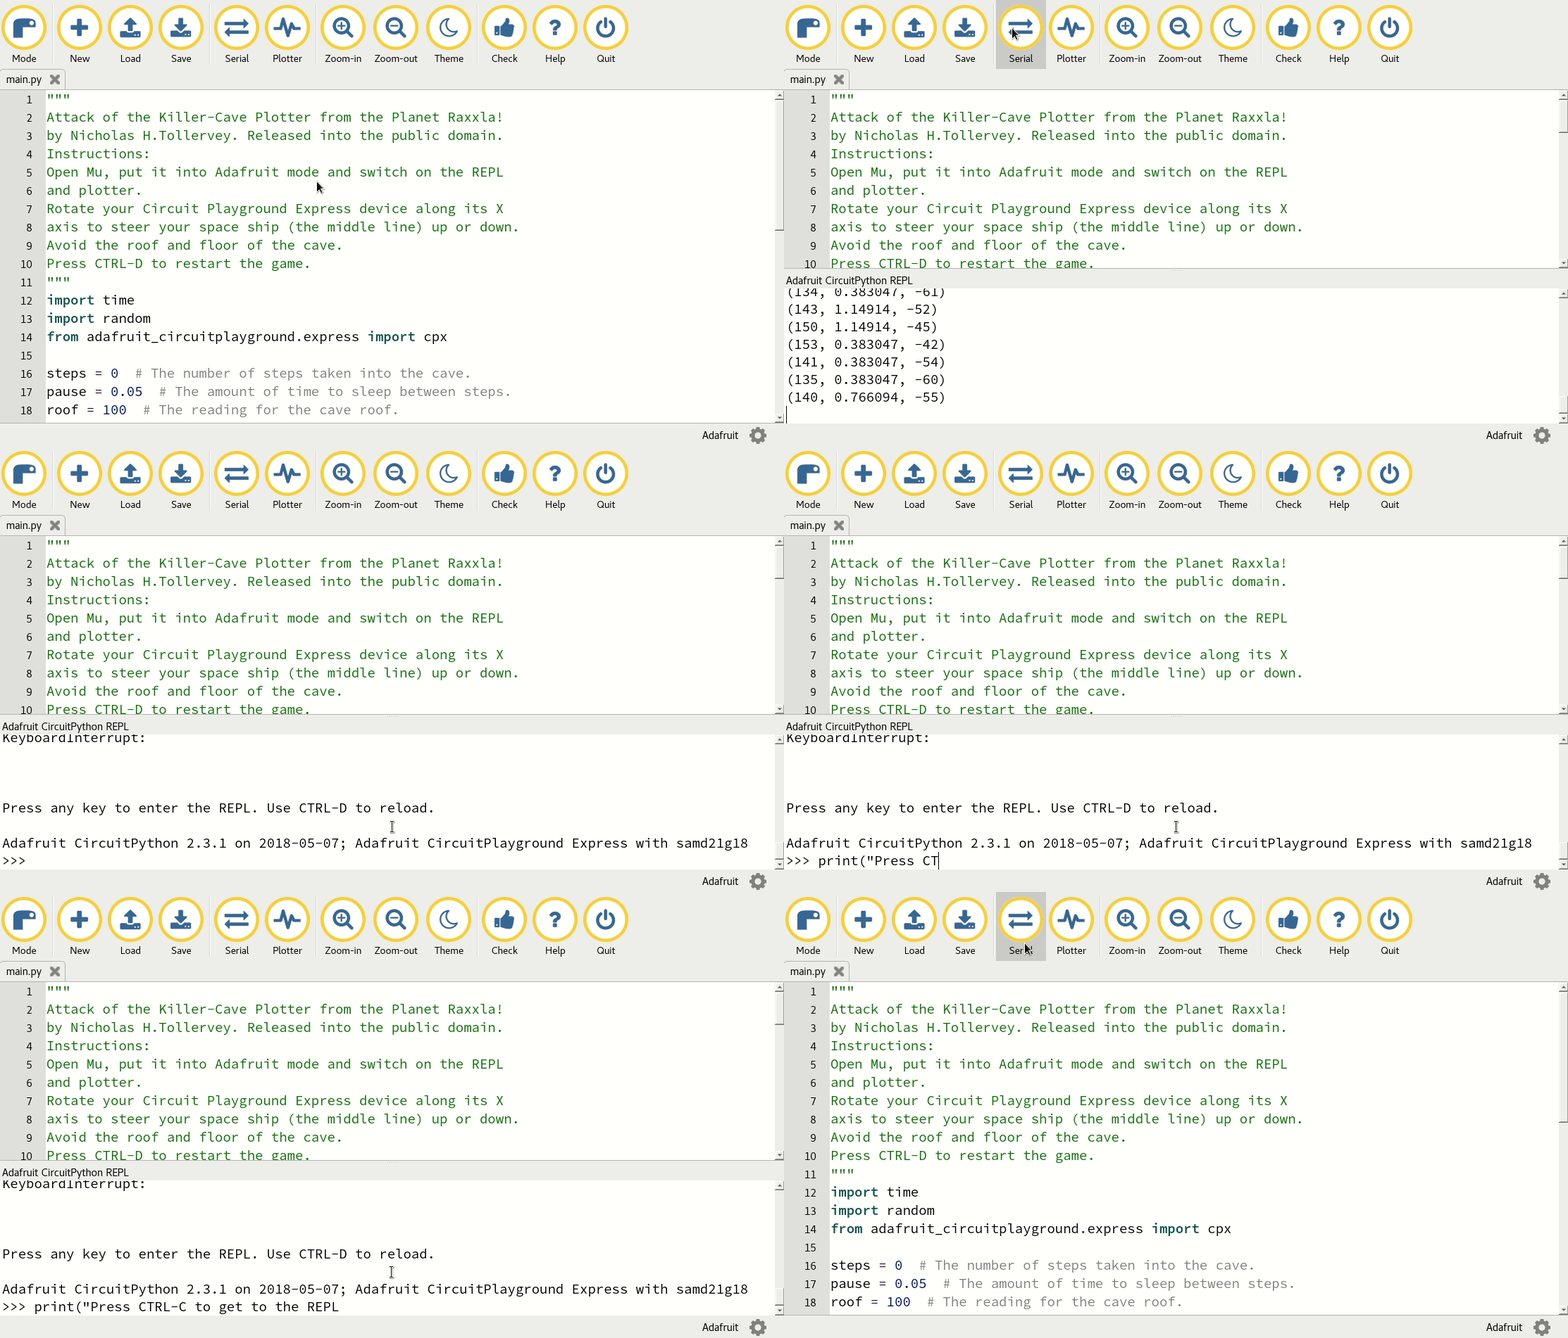
The “Serial” button opens a serial data connection to the Adafruit board you may have connected to your computer. This will result in a new pane between the text editor and Mu’s footer. Any serial data emitted from the device will appear here. If you need to drop into the CircuitPython REPL you should make sure the pane has keyboard focus (just click it!) and then type CTRL-C, as shown below:

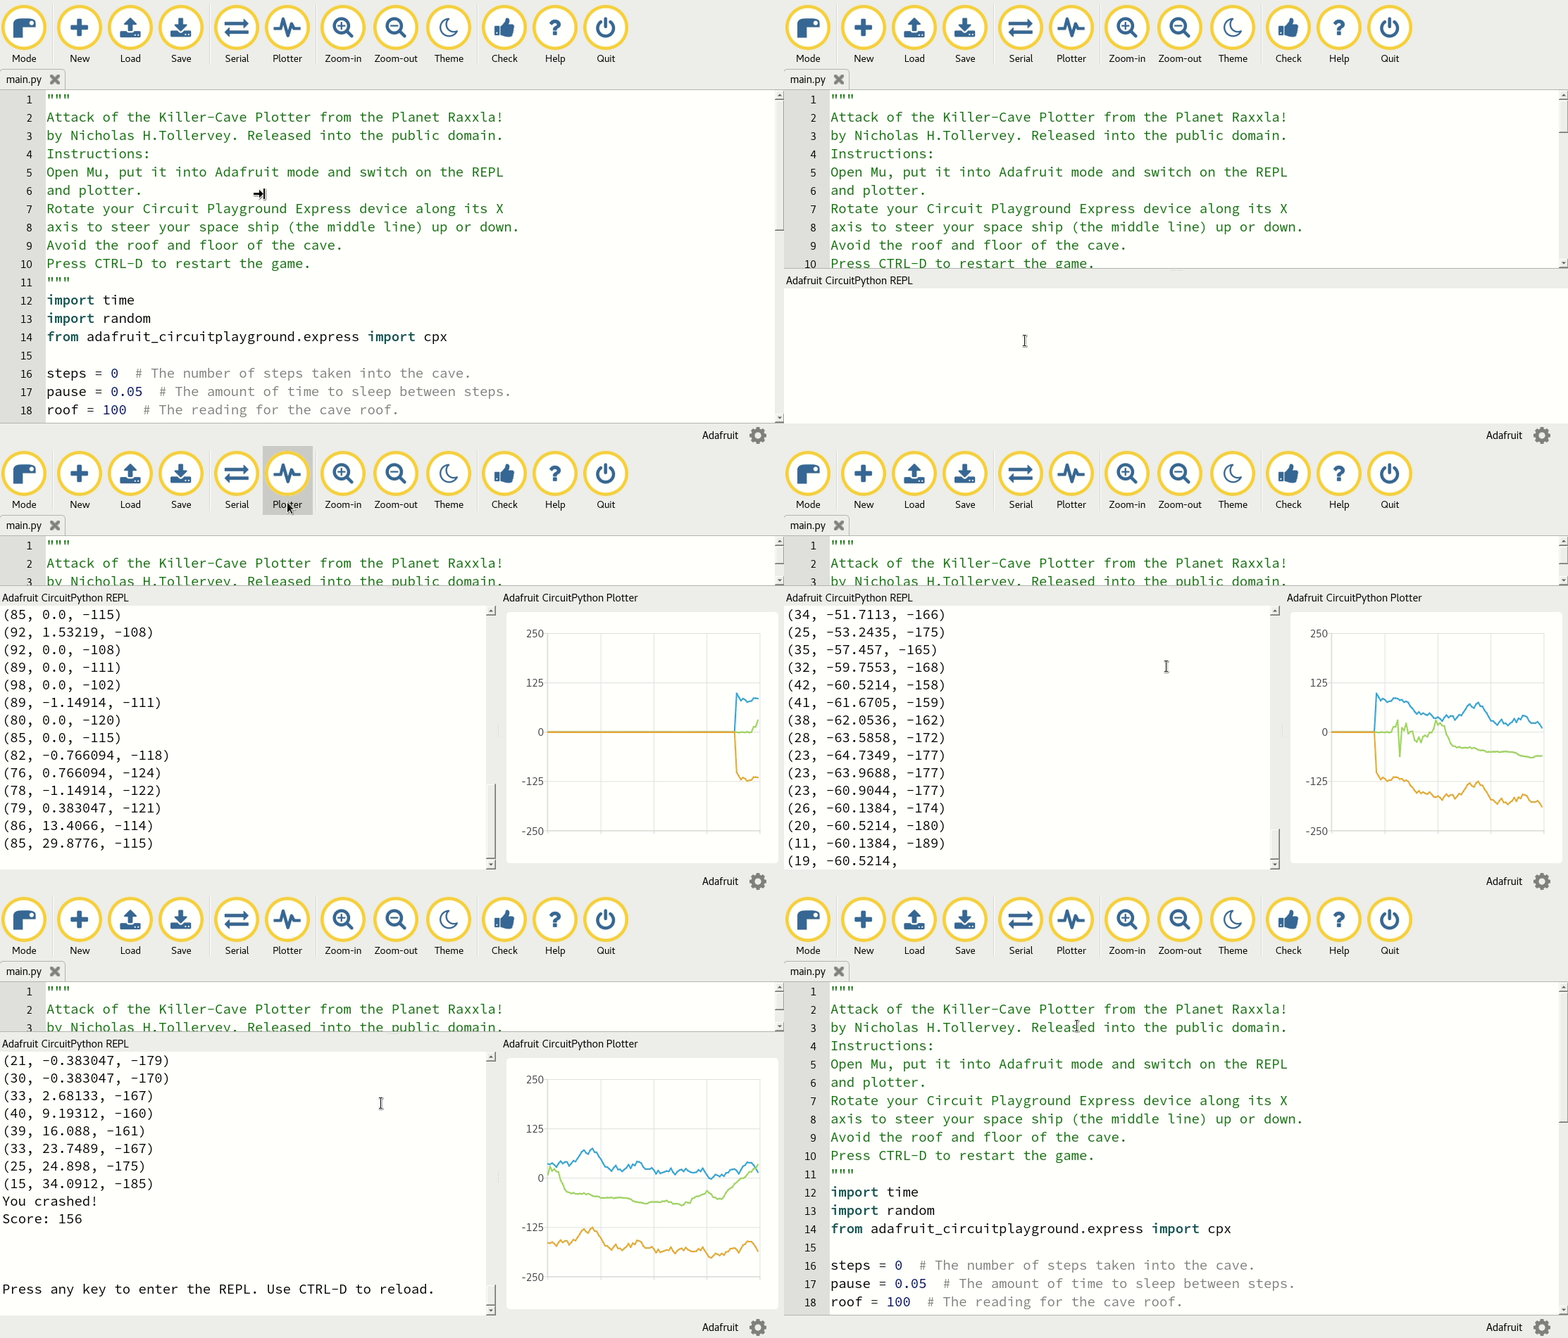
The “Plotter” button opens Mu’s plotter. If your device is outputting tuples of numbers via the serial connection, the plotter will display them as a graph. This is incredibly useful for visualising any data you might be measuring via the device. For more information read the tutorial about Mu’s plotter.

If you’re looking for things to do with your Adafruit board, there’s no better place to look than the Adafruit Learning System on their website.
